Last weekend so us go back to ancient times with a hail ceaser game using our Macedonian and Indian armies. As anyone who reads my game reports knows I don't have any sucess using my Macedonians and normally end up having heavy chariots and elephants rolling up my flank due to my army losing all order as I fail command rolls with an alarming regularity! Also the wall to wall bow fire the Indian army hits you with is a scary prospect and my battle lines usually ends up been badly disordered. With this in mind I decided to use my army differently than normal, instead of just skirmishes shielding my phalanxs I decided to use the peltasts in this role too, with the intention of covering the ground in as short as time as possible (obviously command rolls allowing) where I could bring to bear my javelins before closing into combat. No doubt I would end up losing these units but if it ment my Phalanxs got into combat basically fresh it would be a worthy sacrifice, and just maybe it may cause enough casualties on the Indian infantry to shake a division? I deployed my troops as my dad had scetched a map of his deployment as below,
The outset of the battle saw the armies take to the field on a very open terrain,much to the Macedonians liking!

Macedonian Companion and Thessalian medium cavalry are deployed on the Macedonian flank

Indian cavalry,light and heavy chariots deploy on the opposite flank to my cavalry

With my cavalry been deployed on the opposite flank in my opening turns I moved one of the cavalry divisions round the back of the infantry to cover the left flank of my hoplite Phalanxs, to protect them from the Indian cavalry and chariots. Despite the odd failed command they repositioned in relativity quick time thanks to been drilled and always been able to make a move when a order is failed. My infantry divisions both moved forward although the Greek Hoplites moved at a angle to stay out of charge range of the cavalry and chariots, (although this would not have been a problem as the chariots spent much of the game failing their movement orders thanks to a blunder roll by my dad early in the game.)
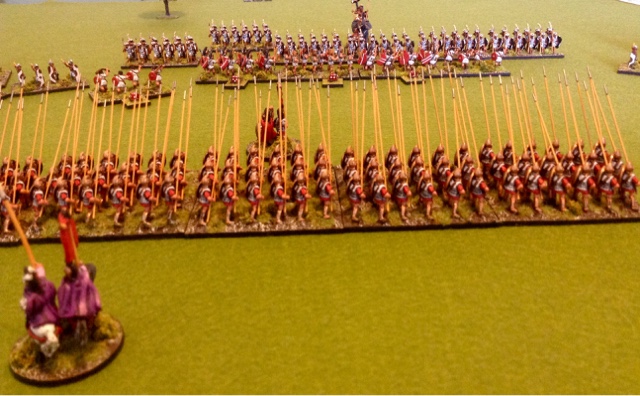
My deep formations of infantry face off against the long lines of the Indian infantry

As I had planned I sent forward a line of peltasts and slingers to engage the Indian infantry. Initially I was successful as the peltasts caused casualties and disorder among the Indian troops. My dad started to retreat his line at this time to escape the javelins and initiative range and continued to pour arrows into my peltasts. Although I was losing casualties I was still achieving my objective of protecting the Phalanxs as they advanced just behind.
Peltasts and slingers in the initial first clash with the Indian archers.

Massed Macadonian pikes in support wait their time to charge
Over on my right flank I had sent some Thracian light cavalry around the flank of the Indian elephants where they harried them with javelin fire before routing the supporting Indian javelin men. I was able to keep these elephants occupied for much of the game with the ability to keep evading when charged by the elephants before returning to javelin range again the following turn.
The Indian elephants come under javelin fire

The battle continues in the centre with the Indian archers and the opposing peltasts

Over on the Indian right flank the chariot and cavalry division blundered for a second time and went charging ahead a full three moves. This made them charge my companions and Thessalian cavalry who countercharged. I was able to defeat the over enthusiastic Indians and repell the attack with out my cavalry becoming shaken or broken which was a big bonus. The Hoplites after losing their skirmish screen charged into the Indian infantry over coming closing fire with out any disorder. Despite been out diced the Indian troops somewhat surprisingly stood their ground and held the Greek troops in melee (thanks to some woeful attack dice by me and some inspired break tests from my dad). However I had my own luck as a Hoplite Phalanxs somehow survived been hit by heavy chariots to the front and flanked at the same time by a unit of infantry. My dad rolled some shocking dice and I was able to hold my ground with a successful breaktest, and to really rub salt in the wounds the division leader who issued a follow me order to the infantry was seriously wounded after I rolled the required double 6! In the following turn I issued a follow me myself onto a unit of Thessalian cavalry who charged into the back of the flanking Indian infantry, this charge saw the Indian infantry break and the chariot give ground as my Hoplite infantry survived.
The thick of the action between the Mercenary Hoplites and the Indian infantry.

Back in the centre my peltasts infantry had been broken but they had managed to cause a few casualties on the Indian foot troops as well as shielding the Phalanxs from arrow fire. However this is were my plan stalled as I had a succession of failed charge orders with the pikes (until very late in the battle) as I was unable to get them into combat with the bowmen. On my right flank my second cavalry division was engaging the elephants and isolated Indian javlinmen.
Thessalian cavalry engage with the Indian elephants as the Phalanxs advance grinds to a sudden stop

The Greek Hoplites were now starting to finally get the upper hand as the Indian archers finally started to break, although a couple of units had become shaken in the process.
The durability of the Greeks proves to much for the Indian warriors over the course of the lengthy combat

Another fine morale test by my dad saw a unit of Indian archers somehow hold their ground despite been faced by two Macedonian Phalanxs, while the rest of the Indian infantry division reorganised itself into a organised battle line awaiting any break through by the pikemen.
The massed ranks of Macedonians make hard work of trying to defeat the Indian archers

With our time up we declared the game a draw. My Macedonians were definetly starting to get the upper hand and victory was definetly in my grasp. Although my new tactics worked reasonably well and I couldn't grumble at my command throws as I didn't fail to many, I feel a big factor in me gaining the upper hand was the inability of my dad to get his chariot and cavalry division to move for most of the game thanks to constantly failing their orders (he was hampered by the blunder which knocked the value of his commander down by a point to 7). With the chariots proving to be no threat I was able to advance on to his infantry without the worry of my flank been rolled up. Maybe if I hadn't failed the command to charge my pike Phalanxs into the Indian infantry towards the end of the game I could have secured a victory. As it was with failing my dad moved his infantry out of initiate range so I couldn't ever get a automatic charge into them. Excellent game though :-)
The battlefield at the conclusion. The Macedonians had made a lot of ground pushing the Indian battle line well back into their half of the table.

A great looking game Neil. The Indians have always been a tough army to face.
ReplyDeleteExcellent looking game and armies.
ReplyDelete