
We fought a cracking game of Blackpowder last Sunday evening using for the first time my dads 10mm British and French Marlburian armies. I've only sampled this period once before when I took a command at the big game put on by the lads up at Westerhope. We used the extra rules from the black powder supplement Last Argument of Kings with a couple of additional amendments my dad felt help give the feel of the period. I opted to play the British and Austrain force, with my dad using the French/Bavarian/Irish army.
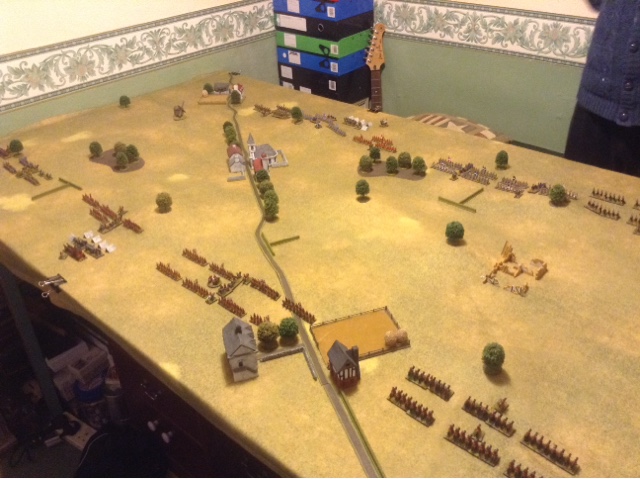
The armies deployed for battle
The battalions of two British brigades in the centre of the battlefield

Over on my left flank is the Austrain Currasiers and infantry brigades.these troops would preform somewhat underwhelming during the course of the game


A long hill dominated the centre of the battlefield and this is where most of the heavy fighting was to be done. My dad rolled the better command rolls and managed to get his French infantry deployed on the hills before I could get there along with his artillery. It was going to be tough to dislodge the French infantry from this position, but it was exactly what I intended on doing. I advanced both my lines up to musket range as quick as possible and engaged in a fire fight with the French.
The British lines advance towards the French infantry on the hill line under heavy artillery and musket fire.

A view from a French prospective as the British infantry advance.

The Barvarian brigade eventually obeyed orders and advanced to occupy the buildings in the town

The first lines of both armies suffered heavy casualties with a number of units becoming shaken and been withdrawn to rally behind their second lines. It was around this time that I started to get the upper hand as I was able to cause disorder on a number of French units for a couple of turns in a row which allowed me to push my troops up to point blank range. My dads Irish brigade was in real danger of breaking at this point but some astute rallying helped keep them I the game and stop the French right centre from collapsing.
The British make there final move to drive the French from hill line by moving up to point blank range.

After blundering and retiring two moves the Austrain infantry returned to the position of the French right flank. However after my dad had moved his Currasiers around to threaten my flank, following this I managed to fail the Austrian battalions order to turn and face the new threat of cavalry, Instead They remained stationary as the French Currasiers charged into there flank. Needless to say the infantry were broken, although it surprisingly lasted for two rounds of combat before they turned heels legging it!

On the centre left a battalion of French infantry crumbles under the pressure from the British infantry and a supporting battalion of French infantry turns its heels and runs aswell.

With this sucess on the right hand side of the hill I moved my Dragoons forward to try and capitalise on the gap in the French line. The Dragoons charged and subsequently broke another unit of French infantry breaking the brigade. On my left flank the French and Austrain Currasiers fought over a number of rounds with eventually both brigades becoming shaken.
A French infantry battalion is destroyed by the British Dragoons

Both Our cavalry on my right hand flank had positioned itself into a stalemate as neither side committed them to combat. My dad used a portion of his cavalry to reposition in the centre where the gaps had appeared from the broken French infantry brigade who had occupied the hill top. A unit of French Dragoons managed to call a follow me order and survived some poor closing fire from the British infantry, who in turn fell back from the onslaught before routing in the following round of combat, as a result of this both supporting British infantry also rolled very low on their moral test and joined there comrades in fleeing from the battle. My gains on this flank had all but been lost as I had no reserves to filter into the combat. Along the centre I made one final push to break the battered French second line along the hill top. I had moved my battalions to point blank range to get the best chance at breaking the French line but alas Unlucky for me I managed to roll some quite horrific dice and caused no casualties or disorder against the French. This was to prove the vital moment in the game as my troops too were badly shot up and I had vitally been unable to rally a unit from my second Bitish brigade with my CnC over the last two turns. This ment if I suffered one more unsaved hit on this brigade they would be broken and my whole centre would have to retire.
The final volley from the French breaks the British centre

My dads firing in the following turn proved to be more deadly than mine had and I failed to save one of the hits on the only fresh remaining battalion of the second brigade rendering it now shaken. The following morale saw me roll a four and with that the brigade broke. At this stage although my army wasn't completely broken, I was forced to start retreating with my remaining battalions in the centre and I was now in no position to continue. My ineffective firing phase in the previous turn had proved a major turning point in the game and my dad had been able to capitalise on this opportunity. Had I managed to score a few hits I could have shaken a number of French battalions who were one hit from becoming shaken, possibly breaking them aswell and then been able to take control of the high ground, this was how delicately the game been had been poised at this late stage.
The victorious French troops still hold the hill line as the British troops start to retreat from the battlefield, in the back ground you can see the remains of the British 1st brigade routing from the field.

Blackpowder once again proved to be very cut and thrust and at times very unforgiving ( just ask the Austrain batallion who after failing to pass their command roll were flanked by a unit of Currasiers!). The amendments definetly helped give a feel to this period, especially not been able to shoot if you make more than one move. A cracking game, definitely a period I look forward to playing again.
The final position of the battlefield

Super looking game
ReplyDeleteThanks for the comment
DeleteSounds great, splendid armies and table!
ReplyDeleteThanks for the comments :)
DeleteLovely looking game and you really get the feel of a large scale battle:)
ReplyDelete