Showing posts with label Black Powder. Show all posts

Saturday, 27 August 2016

Rogersville ACW scenario


                                                            Rogersville
                               ACW scenario from the old 'Miniture Warfare'
Before I went away on holiday for a week from which I have just returned I managed to grab a game against my dad using Blackpowder and the supplement Glory Hallelujah to fight a scenario my dad had dug out from his mountain old magazine clippings for the ACW. I had hoped to write a report before I went on holiday but this proved to be impossible so I have uploaded the photos of the game with out much of a blow by blow account of the game as frankly I can't remember everything πŸ˜„. What I do recall is that it was a very close game which myself as the Union player managed to win as I just about, and I mean just, took control of the town and hold it till the time ran out. Both our armies were very much on the brink of defeat due to broken brigades but thanks in large to the Irish brigade I hung on in there. My dad suffered some bad command rolls which pretty much accounted for the non participation of one of his infantry brigades on the far right flank which he could just not get to move. Early in the game my morale saves were poor and I quickly lost a brigade in the centre but fortunately the Irish brigade were next to them and steadied the centre of my battle line before taking the town from the Rebs. My dads Texan brigade fought hard and were unlucky not to regain the town late in the game before they too started to suffer heavy casualties. I also managed to kill the Rebel general who was shot by a sharp shooter from one of the Irish regiments, the first time I have managed this since we started playing the glory hallelujah supplement! It was another great game, brutal and hard going trying to keep your troops from becoming shaken, but this is what makes the game interesting, also it put an end to a poor run of performances from myself of late!

A Rebel infantry brigade enter the battlefield
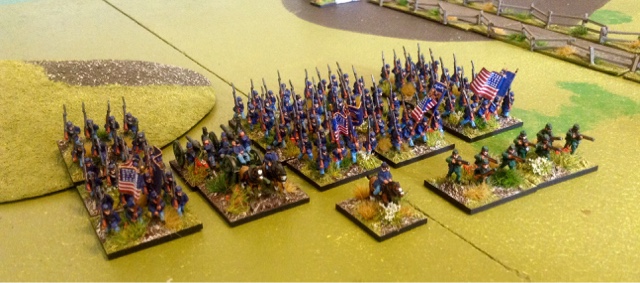
Aunions Infantry brigade rushs in March column to try reach the town before the Rebs 
Union cavalry quickly dismount and secure the farm ranch on the left flank
The rebel forces deploy into line as they reach the outskirts of the town
The confederate cavalry dismount around the farm area on their left flank
The union troops still in March column with the sharp shooters scouting ahead
The fight over the town sees early rebel sucess
However the unions reinforcements  arrive and start to drive the rebel troops back from the town
The Irish brigade deploy ready to assault the rebel defenders in the town
The Texan brigade deploys and launches a hard attack against the union centre which sees one Union brigade break 

The Rebs ready themselves for the union attack
The Irish brigade over come some weak rebel shooting and charge into the defenders
With the Irish brigade in full attack the supporting union infantry brigade advances through the other side of the town, eventually breaking the confederate brigade, although it was very close to breaking its self
The Irish brigade is victorious and routs the rebel defenders before it rallies in the town to face the threat from the Texan brigade
Some serious fire fighting between the Texans and the Irish erupts but neither of these elite troops takes one step back.
A final attempt to break the Irish is repulsed and the reamain in control of the town as the game reaches its end
The final position, a Union victory!
This is a picture from the New York Times in the week after the battle showing the Irish sniper been commended for his brave actions and damm fine shooting in bringing down the Rebel General in the newly held Union town of Rogersville.
                                                   
                                                         The New York Times 
VICTORY!!! See's Rogersville in Union hands as Rebel General Falls to the bullet of Paddy O'Leary of the 1st battalion of the Irish brigade


Sunday, 21 August 2016

Marlburian/War of Spanish Succession Blackpowder game


Our last game saw my dad and I fight a Marlburian/War of Spanish Succession game using Blackpowder rules with some amendments for this period. Last time out I was defeated using the British in a very closely contested game, so this time I used the French, however the end result was the same and I was defeated, although comprehensively this time by my dad and his British. I started the game well and caused a lot of disorder and casualties amongst one of the British centre brigades, especially from my first volley fire but I couldn't quite get the final casualties to break the brigade. However this did not last and I suffered from having some very inept brigadiers (we randomly rolled their levels before the start and I rolled an arlarming number of 1's resulting in over half of the brigadiers been of a level 7). This really hindered my attempts to rally my batallions as they were for the best part within 12 of the enemy meaning I required a score of 6 or under on 2d6, and this really didn't happen at all despite numerous attempts, in contrast my dad managed to rally his troops when they were on the verge of becoming shaken, this is vital in Blackpowder games. I lost my French cavalry early meaning I had to turn my Bavarian brigade to oppose the threat on their flank from the English cavalry, this enabled my dad to attack my centre with 2 brigades against my one which unsurprisingly I lost. On my right flank I had no cavalry opposing my Dragoons but I was unable to get the three regiments to move (yep a command value of 7, thus dropped to a 6 as well when he fell casualty) so could not exploit the facing Austrain brigades flank. When I did get them to move i was reckless with them and wasted the brigade and got them pretty shot up. So despite not been the greatest of performances from me we both enjoyed the game and as usual Bkackpowder was fairly ruthless at times and it was a nice looking game to, I think it is a very attractive period to play.
 
French Currasiers in support of one of the French infantry brigades.
Despite drawing a map of our deployment, My dad deployed a mirror image opposite me with his Currasiers in support of a central infantry brigade, father like son!
Two brigades of English cavalry 
Another central English infantry brigade and artillery
The initial advance of my French centre saw me take the centre of the table
The Irish brigade occupy the church on the right flank 
The Austrain brigade await on the hill opposite the advancing Irish and (quite stationary) French Dragoons
4 battalions of French infantry led by the CnC advance towards the hill line
Once they reached the high ground  they engaged in a fire fight with the English centre
Somewhat unfortunately after I managed to shake a English infantry battalion they were forced to reteat, This opened up a clear path for the Austrain Currasiers to charge into the French infantry who after a dismal stand shoot reaction turned and fled opening a rather scary looking hole in my battle line with two more regiments of Austrain Currasiers lurking very menacely in the background 
With the French cavalry been quickly dispersed the Bavarain brigade had to turn from the centre to face the threat of the English cavalry
The English line starts to move forward as the French centre starts to waver under some very aggressive artillery and musket fire 
The Bavarian brigade becomes stretched as it is attacked on two fronts, however they dug in and held their ground 
The French Currasiers managed to move into the alarming hole in the French infantry line and managed to quell the threat from the Austrain cavalry although it left the currasier brigade on the verge of been broken
After a few rounds of failing to rally points of their morale the Irish brigade is broken after seemly having the upper hand against the Austrians  
Enough is enough for the FrenchGeneral and he orders the French centre to retreat after the brigade is devastated from the English cannon fire in particular which resulted in two battalions flee from the battle field  
The final position, the yellow markers under the brigadiers represent a broken brigade, basically I had lost my entire right flank and centre.

Friday, 24 June 2016

GLORY HALLELUJAH

This week saw us turn our attention to the ACW as we were keen to try our hand at the new Warlord games supplement GLORY HALLELUJAH for black powder rules. My dad had been previously using rank and file rules but felt this supplement with all the amendments to the Blackpowder rules would show a good reflection of fighting the ACW period. 

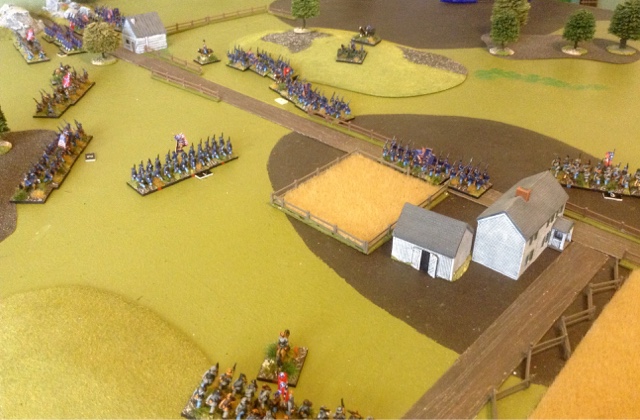
The confederate centre moves hastly towards the central objectives of the farm land
Union infantry and artillery on the March 
The Texas brigade engages in a fierce fire fight over the farm area
More rebels advance towards the fighting in the centre
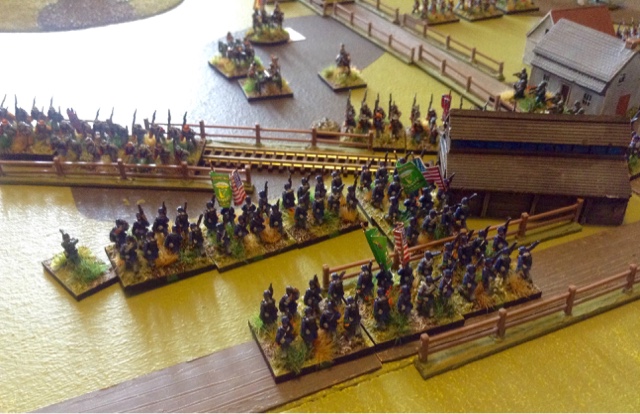
Massed ranks of Blue uniforms form line behind the picket fences
Out flanked and under heavy fire a rebel regiment has enough and breaks
The 'Oldie' rebel brigade hold the right flank reluctant to engage at close quarters 
Neither side wants to give ground over the centre of the battlefield as the fire fight intensifies 
The union 3rd brigade attacks hard on the right centre of the confederate centre as it starts to waver
The iron brigade advance through the fields as the confederate right flank reels in the face of the fire power
Urged forward by the brigadier and 'Rebel yell' a union regiment is out flanked and broken 
The fight over the farm land hangs in the balance as the rebel troops move to point blank range to use there smoothball to maximum effect to dislodge the stubborn Union defenders
The tough Texan brigade charges over the fences and drives back the union defenders 
A union counter attack sees the rebel attack crumble on the left of centre as the brigade is broken
Artillery fire supports the wavering old brigade of rebels who are desperately hanging on to the right flank

The game played out really well with the new additions to the rules changing the feel from a regular Blackpowder game. The withered rule was particularly different as troops who failed a break test from shooting are not removed from play, instead they give ground,unless they are behind a denfensive position were they can remain, this happened a couple of times with my dad and it proved to be important in the union holding the right centre farm objective. as the Confederate player I just about managed to hang for a draw, my Texan brigade were excellent throughout the game and with their new rules they will prove a very tough brigade to break. The morning session was all my dads as I really struggled with commands rolls and hitting anything with firing, however after dinner my luck changed and I managed to fight my way back into the game. The new rules make it a difficult thing to charge (unless your Texans) with all the minus factors to your command roll so you are encouraged to fire fight which gives the feel of a ACW battle, and also on a few occasions in this battle,encourages you to use the follow me rule (you can imagine your brigadier riding in front of his men, hat in his hand waving above his head encouraging his boys forward) Even interpentrating your troops is not as straight forward as in the main Blackpowder rules giving you something extra to ponder. Overall a thumbs up from me and a very enjoyable game.

The end positions:
The left centre was held by the union as my rebel brigade had broken and was in full retreat
The Texans held the centre after breaking two brigades of unions in the battle over the farms
The right flank of the rebel just about holds the union attack
And a picture of some wagons :-)

The supplement we used, well worth the investment for Blackpowder ACW games with loads of historical scenarios included